I found this part of the assignment a challenge as I am not very good when it comes to creating models as I experienced last year from 3D modelling. However, I feel that I have produced simple but effective artifacts whish fit in well with the scheme of the project. I found it hard to create good animation with a range of techniques rather than just a path constraint so I tried new techniques in the form of slice and reactor hinges. I feel that I could of included a person with bones and ik solvers to improve. I am happy with the outcome although is basic is a very big improvement from last year and feel I am going in the correct direction. My knowledge of 3ds max has again greatened from this module.
I enjoyed working within the group and feel that everyone has contributed to the best of there ability. It is clear to see that 3D modelling and animation is not my strong point but feel I have gave it a really good attempt.
Friday 9 December 2011
Guildhall Animation Scene
This is the final part of the animation where the person walks into the guildhall and looks at the function room and an exhibition of the paintings that are to be displayed.
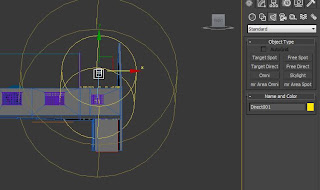
I first merged all the objects that I created which were the eisels and sofa, I then made tables and chairs within the scene. I also set the door up with the reactor settings and the automation, csolver and hinges are shown in the scene. I also made direct lights come through the windows and target spots above and below. I used the same settings from previous scenes for the render and lights. This lightened the room but still needs more light.
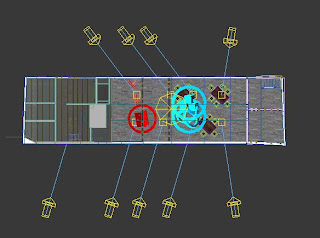
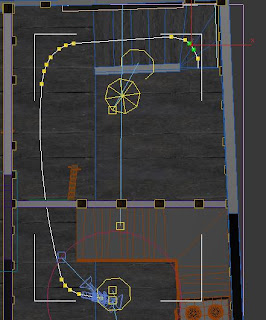
Now that all that was set up I could create the path constraint for my camera from a persons view. I made a line and curved the edges to make a nice flowing scene. I then applied the camera to follow this path.
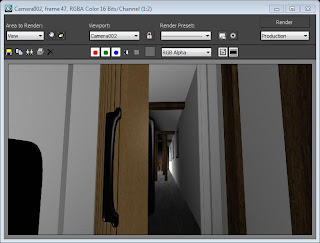
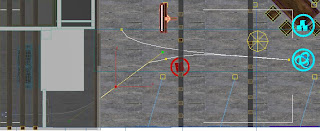 I made sure that the door would open before the camera would enter the scene I done this by changing the autokey settings on the dope sheet. Below is a render of how it looked.
I first merged all the objects that I created which were the eisels and sofa, I then made tables and chairs within the scene. I also set the door up with the reactor settings and the automation, csolver and hinges are shown in the scene. I also made direct lights come through the windows and target spots above and below. I used the same settings from previous scenes for the render and lights. This lightened the room but still needs more light.

Now that all that was set up I could create the path constraint for my camera from a persons view. I made a line and curved the edges to make a nice flowing scene. I then applied the camera to follow this path.
 I made sure that the door would open before the camera would enter the scene I done this by changing the autokey settings on the dope sheet. Below is a render of how it looked.
Toilet Animation
This section is my 4th and 5th scenes. It is where we skip over to the otherside of the Guildhall and enter from the other staircase to the toilet facilities. The first part is a person walking up and looking at all three available toilets. The next then does a slice to show what facilities are in the toilet.
First I merged the doors I created and added the toilet signs to them, I also took the animation sequence off for this stage as I don't them for this scene. I also imported my sofa that I created and put that in position. I again created a line which I converted to a path constraint. I attached a free camera to this to be the person from their eye level. The scene was dark so again I included direct and spot lights to the scene.
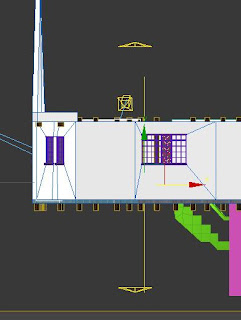
 Now that the scene had been created for the build up, I could create the next scen which would be the box slice. I first merged all my toilet objects and set them up in the correct layout. I made the cubicals in this part as I found it easier to get the correct sizes. I also added more lights to the scene as again it was dark. I used the same settings for the lights as I had for the kitchen animation.
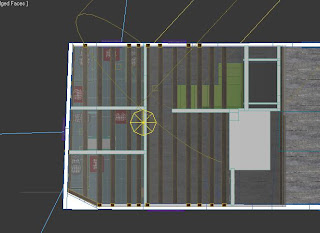
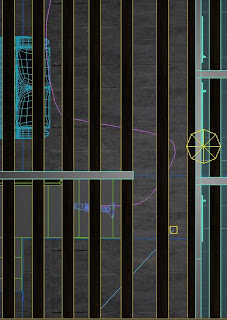
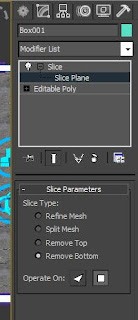
For the slice I made sure that I selected the wall and attached the doors to this, so when the wall was sliced they would also. I then went to the modifier list and selected slice. I opened up the slice modifier and clicked slice plane and selected remove bottom.
 Now that slice was in place I could align with the wall. First I had to rotate the slice so that it was in the y axis and infront of the wall. With autokey selected and in the first scene I put the plane in position, and on the 250th frame moved the slice in the x axis to the end of the building. This would provide the slice I wanted.
First I merged the doors I created and added the toilet signs to them, I also took the animation sequence off for this stage as I don't them for this scene. I also imported my sofa that I created and put that in position. I again created a line which I converted to a path constraint. I attached a free camera to this to be the person from their eye level. The scene was dark so again I included direct and spot lights to the scene.
 Now that the scene had been created for the build up, I could create the next scen which would be the box slice. I first merged all my toilet objects and set them up in the correct layout. I made the cubicals in this part as I found it easier to get the correct sizes. I also added more lights to the scene as again it was dark. I used the same settings for the lights as I had for the kitchen animation.
For the slice I made sure that I selected the wall and attached the doors to this, so when the wall was sliced they would also. I then went to the modifier list and selected slice. I opened up the slice modifier and clicked slice plane and selected remove bottom.
 Now that slice was in place I could align with the wall. First I had to rotate the slice so that it was in the y axis and infront of the wall. With autokey selected and in the first scene I put the plane in position, and on the 250th frame moved the slice in the x axis to the end of the building. This would provide the slice I wanted.
Kitchen Animation
This animation uses the first two scenes where the camera will go up the staircase and go into the kitchen and provide a 360.
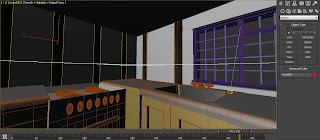
First I added the created models for the kitchen by merging the files, I then created the layout of the kitchen to which I was happy with. I also added the doors that I had created and took off the animation for the door that leads to the guildhall room. I left the animation on for the kitchen door and used autokey to edit the ranges. I then set the project up to render at HDTV (video) 1280x720, at 25fps. From here I added a camera and a line which would be my path constraint. I then attached the camera to this path and made the camera follow asif a person was walking through.
I then done a few render shots and found that the kitchen and walkthrough were very dark. I introduced the use of both target direct and spot lights and edited the hotspot to 45 and falloff to 150. I also changed the multiplier to 0.5. This provided a nice soft light that allowed the scene to be seen clearer.
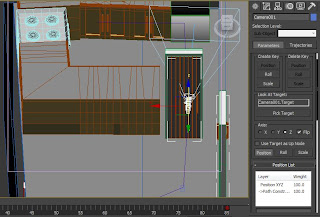
Now I was happy with how the shot looked I edited the line (path) so that it was less jaged and smoother. I done this by chamfering the edges of the line. I also included a circle and another camera. This time I used a target camera and set the target to the circle path. This would provide me with my 360 effect.
 Below is a shot of how my shot looked from a camera view.
I used the autokey to allow me to manipulate timings for the door opening when using the hinges and to change the angle of the camera at certain times of the production.
First I added the created models for the kitchen by merging the files, I then created the layout of the kitchen to which I was happy with. I also added the doors that I had created and took off the animation for the door that leads to the guildhall room. I left the animation on for the kitchen door and used autokey to edit the ranges. I then set the project up to render at HDTV (video) 1280x720, at 25fps. From here I added a camera and a line which would be my path constraint. I then attached the camera to this path and made the camera follow asif a person was walking through.

I then done a few render shots and found that the kitchen and walkthrough were very dark. I introduced the use of both target direct and spot lights and edited the hotspot to 45 and falloff to 150. I also changed the multiplier to 0.5. This provided a nice soft light that allowed the scene to be seen clearer.

Now I was happy with how the shot looked I edited the line (path) so that it was less jaged and smoother. I done this by chamfering the edges of the line. I also included a circle and another camera. This time I used a target camera and set the target to the circle path. This would provide me with my 360 effect.
 Below is a shot of how my shot looked from a camera view.
I used the autokey to allow me to manipulate timings for the door opening when using the hinges and to change the angle of the camera at certain times of the production.
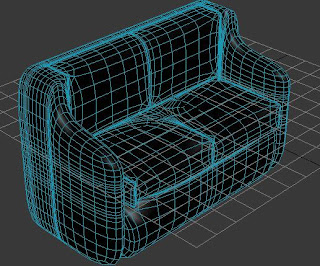
Sofa
The sofa I have created uses the same principles as what my other models have. First I made a box and applied width and height sides. I then moved the vertices to areas I wanted so I could have cushions and arms seperate. I then Extruded areas to mke the sofa make shape. I then selected the edges that were between the cushions, back, front and arms. With these selected I chamfered the edges which produced a nice gap like the gaps in cushions. I applied a black shiny material by playing around with the glossiness and specular levels. I then Turbosmoothed the image and this is how it looks.

Guildhall Scene Furniture - Eisel and Paintings
The eisel was an idea for me to put the paintings that will be displayed in the Guildhall room on. I created a box first using the standard primitives, I then rotated this to create an angle. The rest is just cloned and positioned to make a tripod shape. I then cloned to make a brace to help support the front. I also made a little holdal for the painting to sit in within the eisel. I then applied the same material I put on the kitchen cupboards.
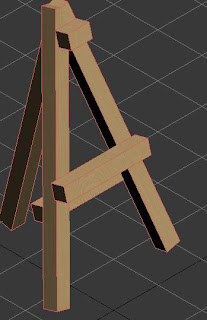 Now that I had that in position I converted it to an editable poly, and attached the whole thing together. I then created another box and placed it on the eisel. This would be the frame for the painting, I then beveled the polygon to produce a section for the painting to sit in. For the frame I applied the beams texture that was given to me by Justinas. I left the painting polygon with no material.
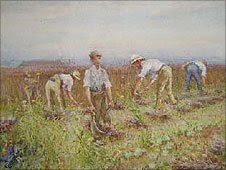
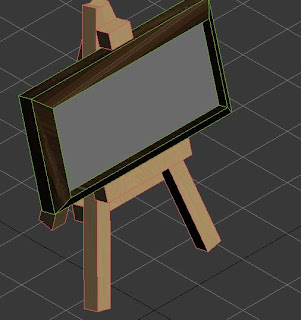 I then imported a painting for which will be in the Guildhall as a bitmap and applied this to the empty polygon.
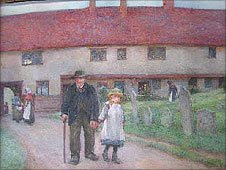
This is where I found the two images for my paintings: http://news.bbc.co.uk/local/essex/hi/people_and_places/history/newsid_9019000/9019486.stm
 Now that I had that in position I converted it to an editable poly, and attached the whole thing together. I then created another box and placed it on the eisel. This would be the frame for the painting, I then beveled the polygon to produce a section for the painting to sit in. For the frame I applied the beams texture that was given to me by Justinas. I left the painting polygon with no material.
 I then imported a painting for which will be in the Guildhall as a bitmap and applied this to the empty polygon.
This is where I found the two images for my paintings: http://news.bbc.co.uk/local/essex/hi/people_and_places/history/newsid_9019000/9019486.stm


Guildhall Scene Furniture - Tables & Chairs
For my tables and chairs I created them whilst in my Guildhall scene. I used box modelling by extruding polygons. I then applied the beams material.


Subscribe to:
Posts (Atom)